2014年8月21日 星期四

Detect Internet status programmatically using Swift and Object-C language

【說明】

此份筆記將紀錄如何偵測網路的連接型態以及監聽網路是否有斷線。


【專案開發步驟】

建立專案:

使用Single View Application模板建立一個名為connectingAbility的專案,使用iPhone裝置。

設計使用者介面:

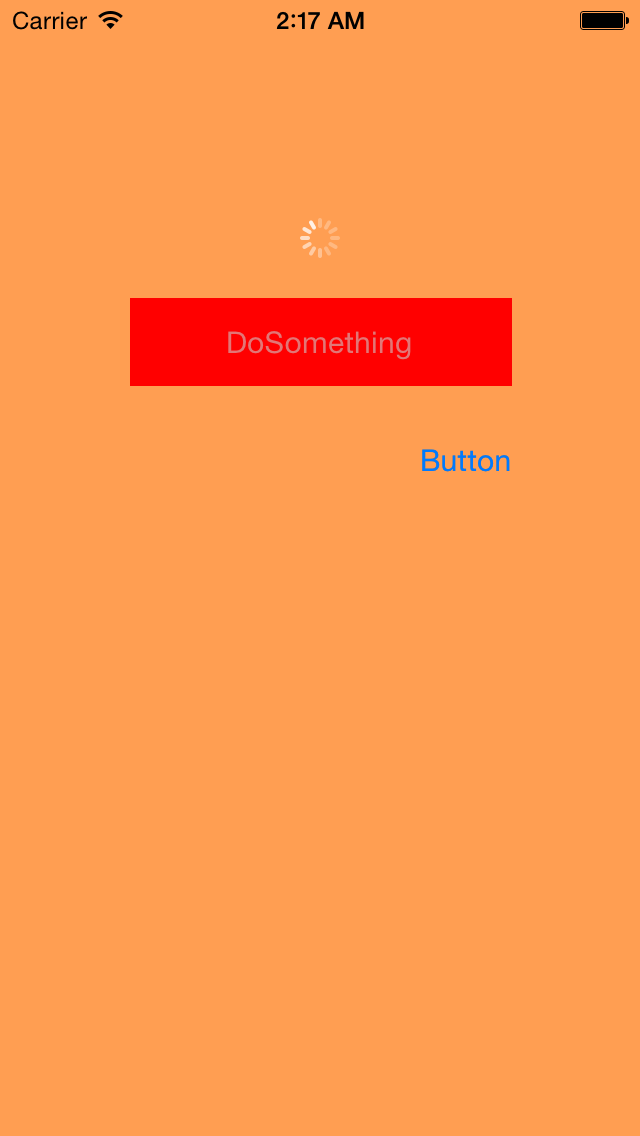
使用TabBarController包著兩個NavigationController,每個NavigationController各帶有一個View,在兩個View上面各加一個Button,並替每個ViewController設定File's owner,如下圖所示。
設計使用者介面

加入Reachability:

Reachability這個Class是由Apple提供的,定義一些method讓我們可以抓取到裝置網路的狀況,我們可以從Apple提供的Sample Code專案內取得這個Class,如下圖所示。
Reachability專案

設定Reachability Class:

修改Reachability.m檔,在dealloc的函式內加入[super dealloc],如下圖所示。
修改dealloc函式

告訴Compiler關閉Reachability.m的ARC,如下圖所示。
關閉ARC

加入所需要的Framework至專案內,如下圖所示。
加入Framework

import Reachability Class:

Swift:
需要建立一個與Object-C橋接的檔案,請參考這裡,在橋接檔案內import Reachability.h檔,之後的每個ViewController皆可使用Reachability這個Class,不需額外import,如下圖所示。
修改橋接檔案內容

Object-C:
在所需要用到Reachability Class的.m檔內新增#import "Reachability.h",如下圖所示。
import h檔

修改StatusViewController:

當按鈕按下後開始判斷所適用的網路是WiFi、WWAN或是沒連線,將以下程式碼加入到接收按鈕按下的func內,如下所示。

<Swift>
@IBAction func click(sender: UIButton) {
    let statusReach: Reachability = Reachability.reachabilityForInternetConnection()
    let networksStatus: NetworkStatus = statusReach.currentReachabilityStatus()
    var status: NSString!
    if networksStatus.value == 0 {
        status = "NoReachable"
    } else if networksStatus.value == 1 {
        status = "ReachableViaWiFi"
    } else {
        status = "ReachableViaWWAN"
    }
    navigationItem.prompt = status
    var timer = NSTimer.scheduledTimerWithTimeInterval(10.0, target: self, selector: "cancelPrompt", userInfo: nil, repeats: false)
}

func cancelPrompt() {
    navigationItem.prompt = nil
}

<Object-C>
- (IBAction)statusClick:(UIButton *)sender {
    Reachability *statusReach = [Reachability reachabilityForInternetConnection];
    NetworkStatus networkStatus = [statusReach currentReachabilityStatus];
    NSString *status;
    switch (networkStatus) {
        case NotReachable:
            status = @"NotReachable";
            break;
        
        case ReachableViaWWAN:
            status = @"ReachableViaWWAN";
            break;
            
        case ReachableViaWiFi:
            status = @"ReachableViaWiFi";
            break;
            
        default:
            break;
    }
    self.navigationItem.prompt = status;
    [self performSelector:@selector(cancelPrompt) withObject:nil afterDelay:10];
}

- (void)cancelPrompt {
    self.navigationItem.prompt = nil;
}
statusReach判斷現在是否連接上網路。networkStatus用來儲存目前連接網路的類型。得到連接網路的類型後去將status這個NSString設定文字。將status文字顯示在Navigation的Prompt內。延遲10後在去執行cancelPrompt這個method。

修改ChangeViewController:

將以下程式碼加入到viewDidLoad內,如下所示。

<Swift>
NSNotificationCenter.defaultCenter().addObserverForName(kReachabilityChangedNotification, object: nil, queue: NSOperationQueue.mainQueue()) { (NSNotification) -> Void in
    let networksStatus: NetworkStatus = self.internetReachability.currentReachabilityStatus()
    var status: NSString!
    if networksStatus.value == 0 {
        status = "Disconnection"
    } else if networksStatus.value == 1 {
        status = "Connection"
    } else {
        status = "Connection"
    }
    self.navigationItem.prompt = status
}

<Object-C>
[[NSNotificationCenter defaultCenteraddObserverForName:kReachabilityChangedNotification object:nil queue:[NSOperationQueue mainQueueusingBlock:^(NSNotification *note) {
    NetworkStatus networkStatus = [self.internetReachability currentReachabilityStatus];
    NSString *status;
    switch (networkStatus) {
        case NotReachable:
            status = @"Disconnection";
            break;
            
        case ReachableViaWWAN:
            status = @"Connection";
            break;
                
        case ReachableViaWiFi:
            status = @"Connection";
            break;
                
        default:
            break;
    }
    self.navigationItem.prompt = status;
}];
像NSNotificationCenter註冊一個監聽者。networkStatus取得目前網路的狀態。判斷是否可以連線。將狀態給NavigationItem的Prompt去顯示。

當按鈕按下後開始監聽網路連線狀態是否有改變,如下所示。

<Swift>
@IBAction func click(sender: UIButton) {
    self.internetReachability = Reachability.reachabilityForInternetConnection()
    self.internetReachability.startNotifier()
}

<Object-C>
- (IBAction)checkStatus:(UIButton *)sender {
    self.internetReachability = [Reachability reachabilityForInternetConnection];
    [self.internetReachability startNotifier];
}
當按鈕按下後internetReachability取得是否有連線。執行startNotifier,當連線的狀況有改變時會發送Notification給NSNotificationCenter,對應到的監聽者就會收到所發送的狀態。


【執行結果】


【專案範例】

2014年8月20日 星期三

Pass Value by NSNotificationCenter programmatically using Swift and Object-C language

【說明】

先前已經會了使用自訂DelegateBlock的方式來將值回傳,這次我們將要使用NSNotificationCenter來達到這樣的目的。

iOS有五種傳值的方式:
1.  建立對方Class的實體變數,取得物件後做getter/setter。
2.  利用target-action的機制,傳值給func。
3.  自訂Delegate。
4.  Block。
5.  NSNotificationCenter。

比較自訂Delegate、Block與NSNotificationCenter:
自訂Delegate:需要六步驟,需倚靠prepareForSegue取得Class的指標。
Block:需要三步驟,需倚靠prepareForSegue取得Class的指標。
NSNotificationCenter:需要兩步驟,不需倚靠prepareForSegue取得Class的指標,若不需監聽通知需要移除註冊的通知。

使用NSNotificationCenter回傳值的兩步驟:
1.  向NSNotificationCenter註冊一個Notification。
2.  當事件發生時,發送Notification給NSNotificationCenter。


【專案開發步驟】

建立專案:

使用Single View Application模板建立一個名為Notification的專案,使用iPhone裝置。

設計使用者介面:

替View加入NavigationController,並完成介面的設計,並將會用到的元件與對應的ViewController做連結,如下圖所示。

設計使用者介面

建立並修改B ViewController:

新增Class,並取名為DetailViewController,並與Storyboard內的ViewController做連結,如下圖所示。

<Swift>
宣告Storyboard內的ViewController的Class是誰_Swift
<Object-C>
宣告Storyboard內的ViewController的Class是誰_Object-C


當事件發生時,發送Notification給NSNotificationCenter,如下所示。

<Swift>
@IBAction func click(sender: UIButton) {
    NSNotificationCenter.defaultCenter().postNotificationName("SendName", object: nameTextField.text)
    self.navigationController.popToRootViewControllerAnimated(1);
}

<Object-C>
- (IBAction)click:(UIButton *)sender {
    [[NSNotificationCenter defaultCenter] postNotificationName:@"SendName" object:self.nameTextField.text];
    [self.navigationController popToRootViewControllerAnimated:YES];
}
當按鈕按下後執行func名為click的func。發送Notification給NSNotification,並帶物件nameTextField的文字。用NavigationController回到RootViewController。

修改A ViewController:

將Class名改為MainViewController,並與Storyboard內的ViewController做連結,如下圖所示。

<Swift>
宣告Storyboard內的ViewController的Class是誰_Swift
<Object-C>
宣告Storyboard內的ViewController的Class是誰_Object-C

向NSNotificationCenter註冊一個監聽者,於ViewDidLoad內加入程式碼,如下所示。

<Swift>
NSNotificationCenter.defaultCenter().addObserverForName("SendName", object: nil, queue: NSOperationQueue.mainQueue()) { (NSNotification) -> Void in
    self.nameLabel.text = NSNotification.object as String
}

<Object-C>
[[NSNotificationCenter defaultCenter] addObserverForName:@"SendName" object:nil queue:[NSOperationQueue mainQueue] usingBlock:^(NSNotification *note) {
    self.nameLabel.text = note.object;
}];
向NSNotificationCenter註冊一個監聽者,監聽名為SendName的Notification所發送的通知,使用mainQueue去執行工作,將收到的通知給nameLabel去顯示。


【執行結果】


【專案範例】

2014年8月18日 星期一

Group async Thread programmatically using Swift and Object-C language

【說明】

我們已經會了使用一個次執行緒來執行工作,避免主執行緒被中斷掉。現在我們要使用兩個次執行緒來加快我們次執行緒的執行速度,而要用dispatch_group的方式將兩個次執行緒包在一起,如果畫成圖如下所示。

比較:
只有一個次執行緒所執行的時間需要15秒。
有兩個次執行緒所執行的時間僅需要9秒。

【專案開發流程】

這份筆記僅修改開始執行次執行緒動作按鈕所觸發的func,其餘的步驟請參考這裡

修改按鈕觸發的func:

將以下程式碼替換掉原先在func內的程式,如下所示。

<Swift>
sender.enabled = false
activityIndicator.startAnimating()
var startDate: NSDate = NSDate.date()

<Object-C>

sender.enabled=NO;
[self.activityIndicator startAnimating];
NSDate *startDate = [NSDate date];
將按鈕關閉,不允許只用者使用。設定activityIndicator開始轉動。設立一個變數紀錄現在的時間。

<Swift>
var group: dispatch_group_t = dispatch_group_create()

<Object-C>
dispatch_group_t group = dispatch_group_create();
建立次執行緒的Group。

<Swift>
dispatch_group_async(group, dispatch_get_global_queue(00), {
    self.doSomething1()
    self.doSomething2()
    self.doSomething3()
});

<Object-C>
dispatch_group_async(group, dispatch_get_global_queue(00), ^{
    [self doSomething1];
    [self doSomething2];
    [self doSomething3];
});
加入一個queue至Group內,並執行三個工作。

<Swift>
dispatch_group_async(group, dispatch_get_global_queue(0, 0), {
    self.doSomething4()
    self.doSomething5()
});

<Object-C>
dispatch_group_async(group, dispatch_get_global_queue(0, 0), ^{
    [self doSomething4];
    [self doSomething5];
});
加入另一個queue至Group內,並執行兩個工作。

<Swift>
dispatch_group_notify(group, dispatch_get_main_queue(), {
    var stopDate: NSDate = NSDate.date()
    var overTime: NSTimeInterval = stopDate.timeIntervalSinceDate(startDate)
    println("Action time = \(overTime)")
            
    sender.enabled = true
    self.activityIndicator.stopAnimating()
});

<Object-C>
dispatch_group_notify(group, dispatch_get_main_queue(), ^{
    NSDate *stopDate = [NSDate date];
    NSTimeInterval overTime = [stopDate timeIntervalSinceDate:startDate];
    NSLog(@"%.f", overTime);
        
    sender.enabled=YES;
    [self.activityIndicator stopAnimating];
});
當Group內的queue都工作完畢後會發送通知,我們必須要在跳回去主執行緒執行其他的工作。設立一個stopDate的變數紀錄現在的時間。overTime用來計算從startDate到stopDate的時間。印出所需要的時間。將按鈕開啟,能讓使用者再次使用。令activityIndicator停止運轉。


【專案範例】

2014年8月15日 星期五

async Thread programmatically using Swift and Object-C language

【說明】

async Thread,非同步執行緒,使用function找空閒的queue去執行次執行緒,使主執行緒可以順利的執行。


最常用在從網路上下載資料時,為了避免下載速度慢而影響了UI的回應,所以用次執行緒去做下載的動作,如此一來就可以保持主執行緒的執行順暢。

有點類似像是將工作移至背景執行的感覺。

此份筆記將紀錄如何實現async Thread。


【專案開發步驟】

建立專案:

使用Single View Application模板建立一個名為thread的專案,使用iPhone裝置。

設計使用者介面:

替View加入兩個Button,一個UIActivityIndicator,如下圖所示。

設計使用者介面
 修改ViewController:

建立中斷執行緒的function,如下所示,我們以執行執行緒的method(sleepForTimeInterval)來模擬主執行緒被中斷。

<Swift>
func doSomething1() {
    NSThread.sleepForTimeInterval(1.0)
}
func doSomething2() {
    NSThread.sleepForTimeInterval(2.0)
}
func doSomething3() {
    NSThread.sleepForTimeInterval(3.0)
}
func doSomething4() {
    NSThread.sleepForTimeInterval(4.0)
}
func doSomething5() {
    NSThread.sleepForTimeInterval(5.0)
}

<Object-C>
@interface ViewController ()
-(void)doSomething1;
-(void)doSomething2;
-(void)doSomething3;
-(void)doSomething4;
-(void)doSomething5;
@end

@implementation ViewController
-(void)doSomething1 {
    [NSThread sleepForTimeInterval:1.0];
}
-(void)doSomething2 {
    [NSThread sleepForTimeInterval:2.0];
}
-(void)doSomething3 {
    [NSThread sleepForTimeInterval:3.0];
}
-(void)doSomething4 {
    [NSThread sleepForTimeInterval:4.0];
}
-(void)doSomething5 {
    [NSThread sleepForTimeInterval:5.0];
}
@end

撰寫當按鈕按下後的function,如下所示。

<Swift>
@IBAction func click(sender: UIButton) {
    sender.enabled = false
    activityIndicator.startAnimating()
        
    dispatch_async(dispatch_get_global_queue(0, 0), {
        self.doSomething1()
        self.doSomething2()
        self.doSomething3()
        self.doSomething4()
        self.doSomething5()
            
        dispatch_async(dispatch_get_main_queue(), {
            sender.enabled = true
            self.activityIndicator.stopAnimating()
        })
    })
}

<Object-C>
- (IBAction)click:(UIButton *)sender {
    sender.enabled=NO;
    [self.activityIndicator startAnimating];
    
    dispatch_async(dispatch_get_global_queue(0, 0), ^{
        [self doSomething1];
        [self doSomething2];
        [self doSomething3];
        [self doSomething4];
        [self doSomething5];
        
        dispatch_async(dispatch_get_main_queue(), ^{
            sender.enabled=YES;
            [self.activityIndicator stopAnimating];
        });
    });
}
當按鈕按下後將按鈕關閉。讓activityIndicator開始旋轉。使用function despatch_async找空閒的queue執行次執行緒。當doSomething做完後使用function回到主執行緒去執行將按鈕開啟以及停止activityIndicator。


【執行結果】


【專案範例】

Pass Value by Block programmatically using Object-C language

【說明】

先前我們利用自訂代理人的方式將值回傳,參考這篇,現在我們要利用Block的方式將值回傳。

使用Block的3個步驟:
1.  宣告Block。
2.  實作Block。
3.  呼叫Block。

Block可以想成是匿名的Function,Block的最大好處就是可以在別的method內實作,取得method內的區域變數。


【專案開發步驟】

建立專案:

請參考這篇

設計使用者介面:

請參考這篇

修改DetailViewController.h檔案:

撰寫使用Block的步驟1,宣告Block,如下所示,將Block宣告在@interface區,讓其他的Class也可以使用。

@property (copy, nonatomic) void (^passVale)(NSString*);
有宣告Property代表可以getter跟setter,一定要使用copy。

修改DetailViewController.m檔案:

撰寫使用Block的步驟3,呼叫Block,如下所示。

- (IBAction)click:(UIButton *)sender {
    self.passVale(self.nameField.text);
    [self.navigationController popToRootViewControllerAnimated:YES];
}
當DetailViewController接收到按鈕按下後會執行click這個function,呼叫passValue這個function,並傳送TextField內的文字。NavigationController傳送message,請求回到Root View Controller。

修改MainViewController.m檔案:

撰寫使用Block的步驟2,實作Block,如下所示。

-(void)prepareForSegue:(UIStoryboardSegue *)segue sender:(id)sender {
    DetailViewController *detailViewController = segue.destinationViewController;
    detailViewController.passVale = ^(NSString *name) {
        self.nameLabel.text = name;
    };
}
利用prepareForSegue抓到DetailViewController的指標。實作Block的method,會傳NSString過來,此時使用UILabel去接收它即可。


【執行結果】


【專案範例】